How It Works
-
1
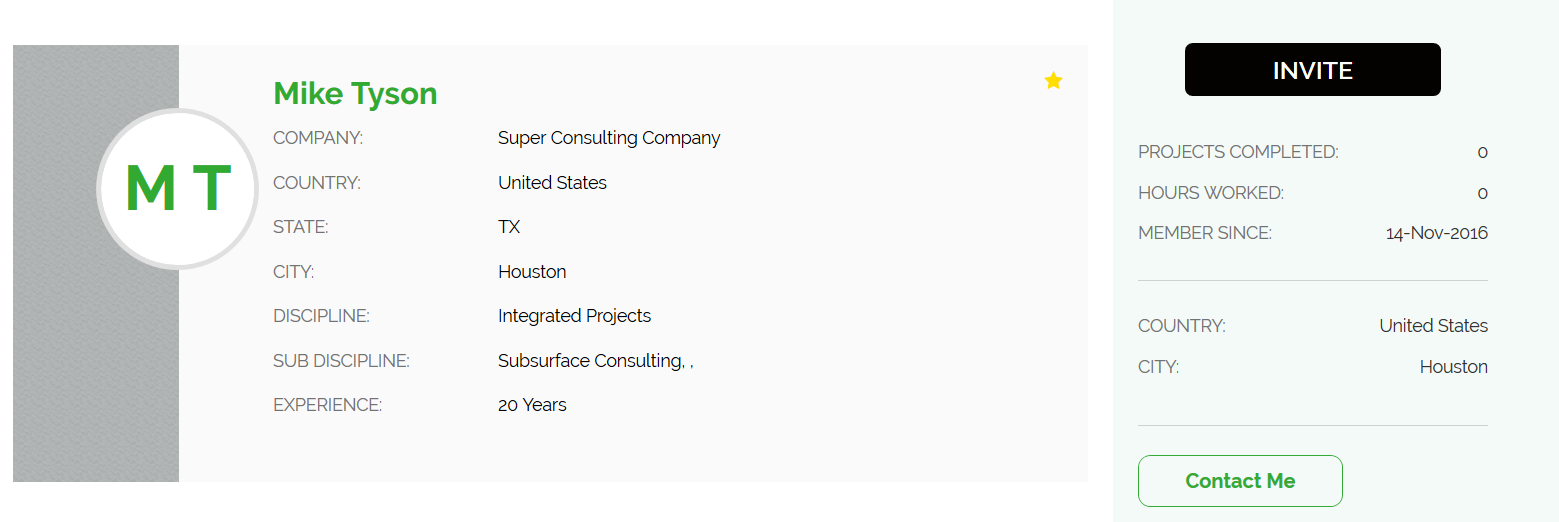
Step 1. Complete your profile
- Provide details about your work experience and skills, including specialties, project history, and any other relevant information you wish to include.
-
2
Step 2. Search and apply for projects
-
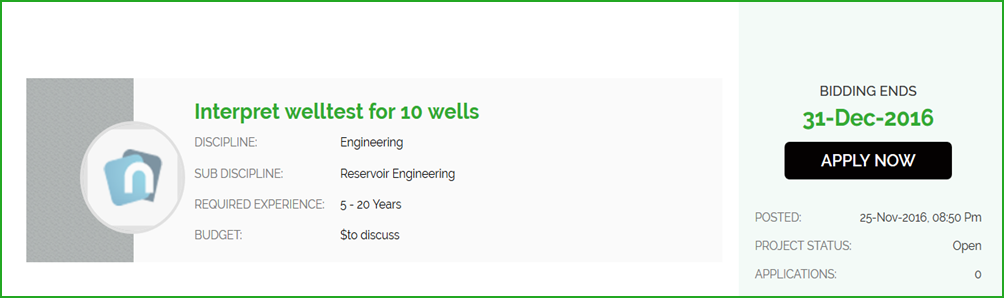
You can browse publicly posted projects.
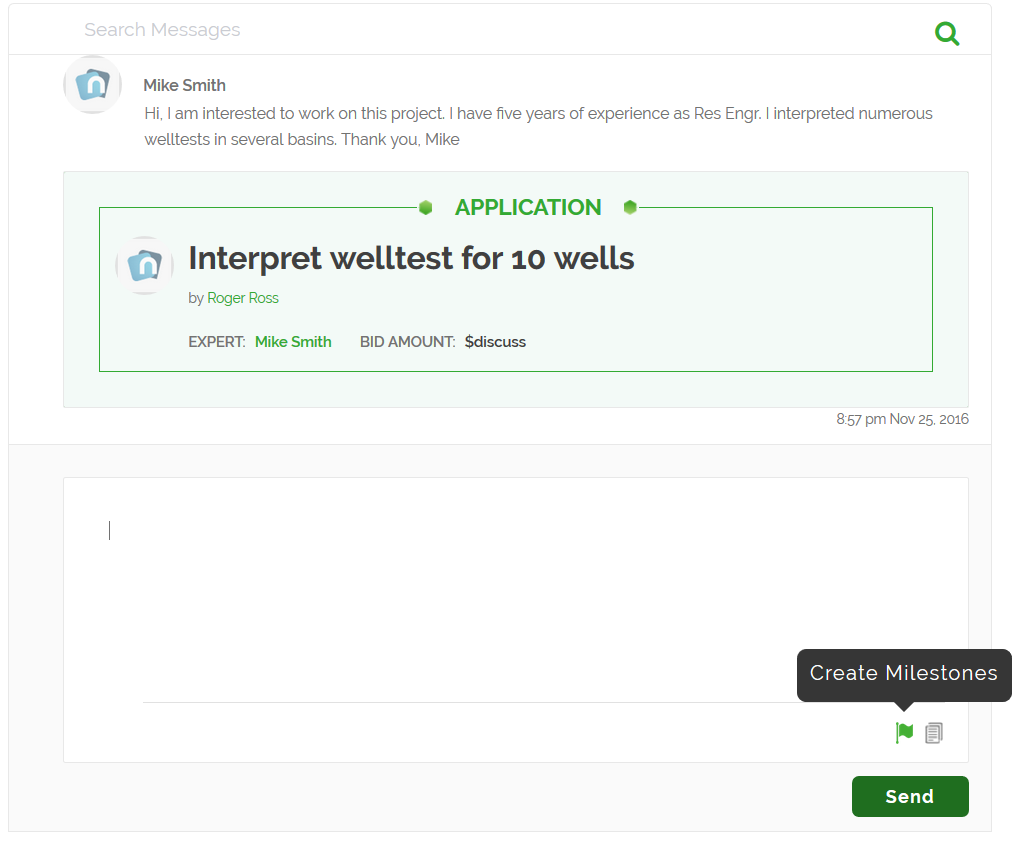
(Keep in mind that many companies will post private projects. Consultants can only view them after receiving an invitation.) - When you find the publicly posted project that interests you or one for which you have received an invitation, you can apply for it with a cover letter.
-
-
You can browse publicly posted projects.
-
3
Step 3. Interview with companies
- A company will contact you through the messaging system if they determine that you are a good fit for the project. During the messaging phase, you can ask questions to get a better understanding of the project scope.
- It is advised to partake in a video or phone interview with a potential client (especially for larger projects) so that both parties can to get know one another and achieve alignment.
-
4
Step 4. Agree on terms and sign the contract
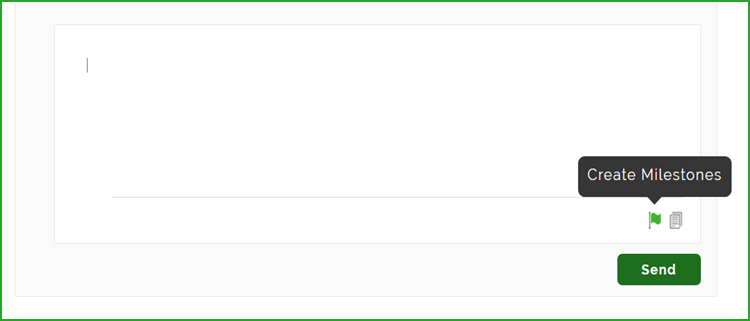
- Discuss with the company whether the project will be paid via a fixed lump sum, according to an or hourly rate, or even through a combination of both! Keep in mind that, regardless of which option is chosen, milestones can still be used to help keep the project on schedule.
- Some projects will already have milestones, but you are free to discuss them and change them during the negotiation stage.
-
- We provide a standard contract and confidentiality agreement which you will be asked to sign, but in some cases companies may want to use their own.
-
5
Step 5. Work on the project
- You can exchange messages and attach files related to the project.
-
6
Step 6. Get paid for the work done
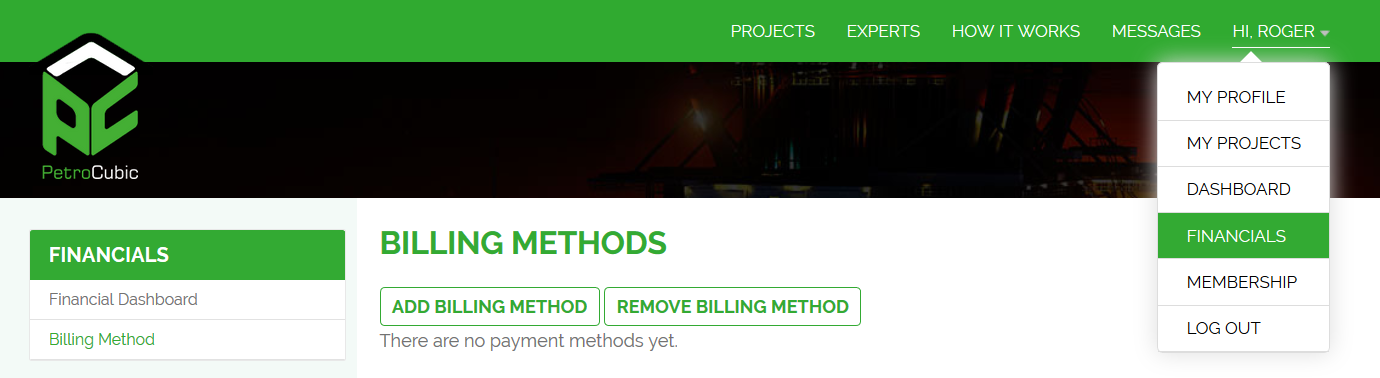
- You can use several methods to get paid.
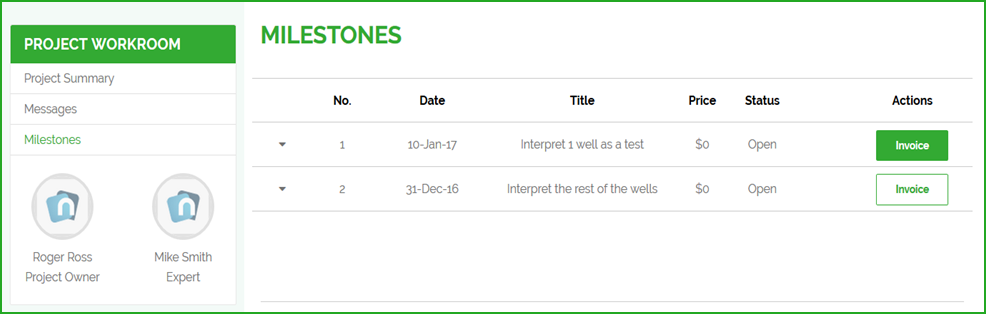
- In order to get paid, you will need to issue invoices for your clients. You can specify the hours worked and the total amount owed, or simply just list the total for fixed-price projects. All invoices are tied to milestones.
-
-
7
Step 7. Finish the project
- After all of the work is finished for a project, you can send the completed work to the client and issue all remaining invoices.
- Clients can then provide feedback and reviews for you based on your work.
-
1
Step 1. Create a Project
-
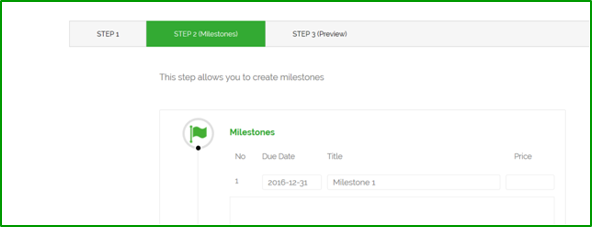
Post a new project, including any relevant details the consultant should know upfront. You can restrict who is able to view the project as follows: all, only specific countries, or private.
(Please note that private projects will not be searchable; you will need to invite experts to bid on your project and then select candidates subsequently.) - Specify milestones, or skip this step for now.
- Review and publish the project.
-
Post a new project, including any relevant details the consultant should know upfront. You can restrict who is able to view the project as follows: all, only specific countries, or private.
-
Step 2. Search for consultants
2- Let consultants to apply for your open project, or search for appropriate consultants and invite them to bid directly.
-
-
Step 3. Interview candidates
3- Exchange messages and select the consultants who will best meet your project’s needs. You can mark these individuals in your favorites list.
- Schedule interviews and get to know potential candidates.
-
Step 4. Agree on terms and sign the contract
4- After you select the right candidate, you can discuss with him or her whether the project should be broken down into several milestones. You can change the original milestones which were created when project was posted, or create entirely new ones. You can also ask for input from the consultant to determine which milestones (if any) will work best for him or her.
-
- Once all terms are agreed upon, you can make an offer to hire the consultant for the duration of the project.
- You can use our standard contract (which has a built-in confidentiality agreement) or use your own.
-
Step 5. Work with the consultant to complete your project
5- You can exchange messages and attach files related to the project.
- You can also change milestones during the execution phase if the scope of the project changes or new details emerge.
-
Step 6. Pay for the work
6- You can use several methods to pay for the work performed.
-
- You will pay by invoices, which are issued by the consultants performing the work.
-
Step 7. Close the project and leave a feedback
7- After the work is finished, you can pay any remaining invoices, close the project, and leave a review/feedback for the consultant.
-
1
Workspace is a network of shared resources (Remote PCs and files).
-
2
Projects and workspaces could be related or be completely independent of each other.
-
3
Both providers and experts could create workspaces.
-
4
You can invite any expert to your workspace or be the only user.
-
5
Workspace creator can control access level to invited users (upload files, download files or remote view only).
-
6
In view only mode experts could not get any data out of workspace and can only work with it remotely.
-
7
All costs related to use of computer resources and software are charged to workspace creator.
-
8
See more details in pricing section
Have more questions? Use
Contact form